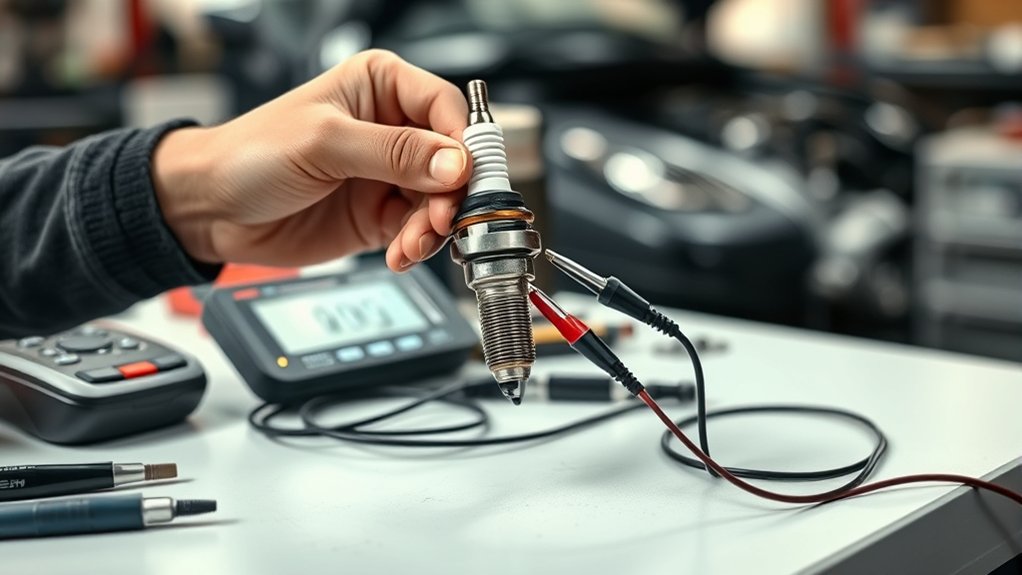
To test a spark plug coil with a multimeter, first ensure the engine is off and the battery is disconnected. This safety step prevents accidental shocks or damage.
Set your multimeter to the ohms setting and calibrate it properly.
Begin by measuring the primary coil resistance, which should typically be between 0.4 and 2 ohms. Do this by probing the coil’s terminals carefully.
Next, check the secondary coil resistance. This value usually ranges from 6,000 to 15,000 ohms. Compare your measurements to the manufacturer’s specifications.
Any readings outside these ranges may indicate a faulty spark plug coil.
Following these steps helps you accurately diagnose ignition coil issues and maintain optimal engine performance.
Key Takeaways
- Disconnect the negative battery terminal and remove the spark plug coil to ensure safety before testing.
- Set the multimeter to the ohms (Ω) setting and calibrate by shorting the probes for accurate resistance measurement.
- Measure primary coil resistance between the coil’s primary terminals; typical values range from 0.4 to 2 ohms.
- Measure secondary coil resistance from the high-voltage output terminal to the negative terminal; expect 6,000 to 15,000 ohms.
- Compare readings against manufacturer specifications to identify faulty coils indicating open circuits or abnormal resistance.
Preparing Your Vehicle for Spark Plug Coil Testing With a Multimeter
Before you begin testing the spark plug coil with a multimeter, you need to confirm your vehicle is properly prepared. Start by verifying the engine is off and cooled to prevent burns or electrical shocks, prioritizing vehicle safety.
Disconnect the negative battery terminal to cut power and avoid accidental shorts. Locate the spark plug location precisely; consult your vehicle’s manual if necessary to identify each coil’s position.
Disconnect the negative battery terminal and accurately locate each spark plug coil using your vehicle’s manual.
Remove any engine covers or components obstructing access to the spark plug coil. Keep the workspace clean and dry to prevent contamination or damage to electrical components.
Following these steps guarantees a safe, efficient testing process, protecting both you and your vehicle while enabling accurate diagnostics of the spark plug coil’s condition.
Setting Up Your Multimeter for Accurate Coil Resistance Checks
Once you have your vehicle prepared, you’ll need to configure your multimeter correctly to measure the coil’s resistance accurately. Start by turning the multimeter on and selecting the ohms (Ω) setting, which is essential for resistance measurement.
Choose a range that suits the expected resistance of the spark plug coil, typically in the low ohms to kilo-ohms spectrum. If your multimeter has manual range selection, set it accordingly; otherwise, use auto-range to simplify the process.
Next, perform resistance calibration by shorting the probes together and adjusting the meter to read zero ohms, ensuring precision. Proper multimeter settings and accurate resistance calibration prevent false readings, enabling you to diagnose the spark plug coil’s condition effectively. Avoid switching settings mid-test to maintain consistency.
Measuring Primary and Secondary Coil Resistance
You’ll start by measuring the primary coil resistance, which typically ranges between 0.4 and 2 ohms. Use your multimeter to check this across the coil’s primary terminals.
Then, test the secondary coil by measuring resistance from the coil’s output to the spark plug terminal, ensuring it falls within the manufacturer’s specified range.
Primary Coil Resistance Range
Measuring the primary coil resistance is essential for diagnosing your spark plug coil’s condition accurately. Typically, the primary coil resistance ranges between 0.4 to 2 ohms, but this can vary by manufacturer.
Use a multimeter set to the ohms scale and connect the probes to the coil’s primary terminals. Verify the coil is disconnected from the circuit to prevent false readings.
Accurate coil resistance measurement helps identify shorts or opens within the winding. Deviations outside the specified range indicate coil failure or degradation.
Employ consistent testing techniques, such as steady probe contact and stable multimeter settings, to obtain reliable results. Always consult the service manual for exact resistance values specific to your coil.
This precise approach guarantees effective troubleshooting before moving on to secondary coil testing.
Secondary Coil Testing Method
To accurately assess your spark plug coil’s functionality, start by testing both the primary and secondary coil resistances using a reliable multimeter. For the secondary coil, set your multimeter to the ohms (Ω) setting and connect the probes between the coil’s high-voltage output terminal and the negative terminal.
Compare the measured resistance to the manufacturer’s specifications to evaluate coil performance. A reading outside the recommended range indicates internal damage or degradation. Incorporating this step into your troubleshooting techniques helps isolate ignition problems effectively.
How to Spot a Bad Spark Plug Coil From Your Multimeter Readings
You’ll want to compare your multimeter readings against the manufacturer’s specified resistance ranges for both primary and secondary coils. Values markedly outside these ranges typically indicate a faulty spark plug coil.
Watch for readings that show open circuits or unusually high resistance, as these are clear signs of coil failure.
Reading Resistance Values
Although it might seem straightforward, reading resistance values on your multimeter requires careful attention to identify a faulty spark plug coil accurately. Start by setting your multimeter to the ohms (Ω) setting, ensuring you understand coil resistance basics. Primary coils typically measure between 0.4 to 2 ohms, while secondary coils range from 6,000 to 15,000 ohms.
Use multimeter usage tips such as touching the probes steadily to the coil terminals without applying excessive pressure to avoid false readings. Record the resistance value displayed and compare it against manufacturer specifications. Values considerably outside these ranges indicate potential coil issues.
Precision in reading and interpreting resistance helps you distinguish normal coil behavior from possible failures, ensuring accurate diagnosis before proceeding to further testing or replacement.
Identifying Faulty Coil Signs
Several key signs in your multimeter readings can help you identify a faulty spark plug coil quickly. If the resistance values deviate notably from the manufacturer’s specifications, it signals coil symptoms that often cause ignition issues.
For example, an open circuit or infinite resistance indicates a broken coil winding, while unusually low resistance suggests internal shorting. Both conditions disrupt spark generation, leading to misfires or engine stalling.
Comparing your readings against standard resistance ranges, typically between 0.4 to 2 ohms for primary and 6,000 to 15,000 ohms for secondary coils, helps confirm coil health. Keep in mind that inconsistent or fluctuating readings also point to intermittent coil failures.
Common Spark Plug Coil Problems Revealed by Multimeter Tests
When a spark plug coil malfunctions, a multimeter can quickly reveal common issues such as open circuits, short circuits, or improper resistance values. These problems directly correlate with coil failure symptoms like engine misfires, rough idling, or difficulty starting.
By measuring primary and secondary coil resistance, you identify ignition issues caused by internal winding damage or insulation breakdown. An open circuit reading indicates a broken coil wire, while a short circuit reading suggests internal shorts compromising coil function.
Resistance values outside manufacturer specifications signal deterioration affecting spark strength. Detecting these faults helps pinpoint whether the coil is responsible for ignition problems. Using your multimeter precisely guarantees you recognize coil failures early, preventing further engine damage and maintaining peak ignition system performance.
What to Do After Confirming a Spark Plug Coil Problem
Address the spark plug coil issue promptly to prevent further engine damage. Once you’ve confirmed the coil is faulty via multimeter testing, prioritize coil replacement to restore proper ignition system function.
Begin by disconnecting the battery to guarantee safety. Remove the defective coil carefully, noting its orientation and connections. Install the new coil exactly as the original, securing all electrical connectors firmly.
After replacement, inspect related ignition system components, such as spark plugs, wires, and connectors, for wear or damage, as these can affect performance. Finally, reconnect the battery and start the engine to verify smooth operation.
Inspect ignition components for damage after coil replacement, then reconnect the battery and confirm engine runs smoothly.
If misfires persist, recheck the ignition system and consider professional diagnostics. Timely coil replacement guarantees peak engine efficiency and prevents cascading ignition failures.
Frequently Asked Questions
Can a Faulty Spark Plug Coil Cause Engine Misfires?
Yes, a faulty spark plug coil can cause engine misfires by disrupting combustion timing, which directly impacts engine performance and reduces spark plug longevity. This leads to inefficient fuel use and increased wear on ignition components.
How Often Should Spark Plug Coils Be Tested?
Think of spark plug maintenance like clockwork: you should perform coil testing every 30,000 miles or during routine tune-ups.
Regular checks catch issues early, ensuring your ignition system runs smoothly and prevents engine misfires.
Are All Multimeters Suitable for Testing Spark Plug Coils?
Not all multimeter types suit testing spark plug coils. You’ll need a digital multimeter with resistance measurement capability and precise testing techniques to guarantee accurate coil diagnostics and avoid misleading readings or damage to components.
Can Weather Conditions Affect Spark Plug Coil Performance?
Think of your spark plug coil like a phone battery; just as humidity impact and temperature effects drain it faster, moisture and extreme temperatures disrupt coil resistance and spark strength. This causes misfires and reduced engine efficiency.
Is It Safe to Test Spark Plug Coils Without Disconnecting the Battery?
No, you shouldn’t test spark plug coils without disconnecting the battery. For spark plug safety and accurate electrical testing, disconnecting power prevents shocks and short circuits.
It also protects your multimeter and vehicle’s electronics from damage.
Conclusion
Testing your spark plug coil with a multimeter is essential since about 30% of ignition failures stem from coil issues. By accurately measuring primary and secondary resistances, you can quickly identify faults before they cause engine misfires or poor performance.
If your readings fall outside manufacturer specs, replace the coil promptly to maintain peak engine function. Regular multimeter checks help you avoid costly repairs and keep your vehicle running smoothly and efficiently.
In conclusion, knowing how to test spark plug coil with multimeter ensures you can detect problems early and maintain optimal engine performance.