To remove a spark plug boot, first verify the engine is cool and disconnect the negative battery terminal.
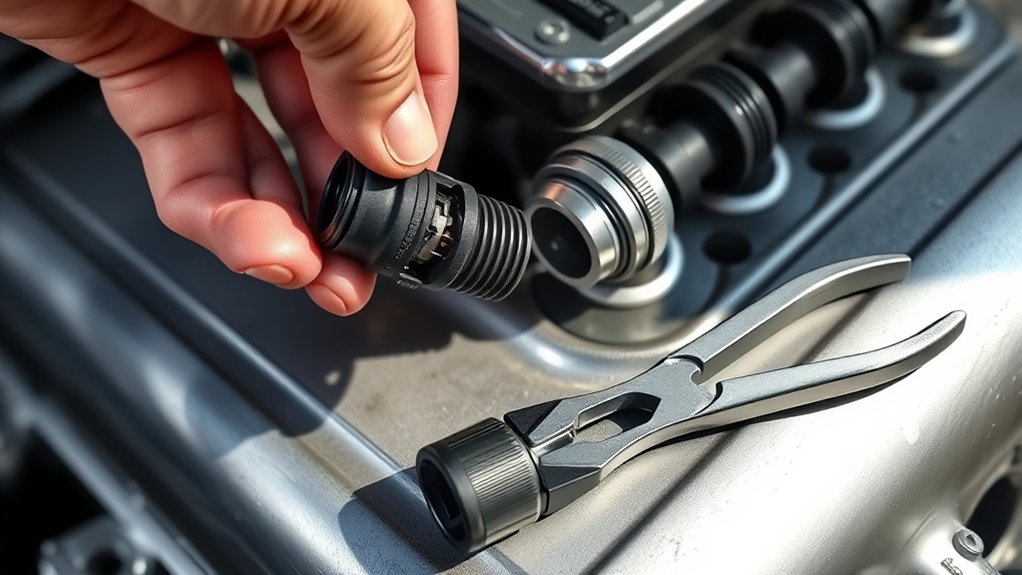
Firmly grip the boot at its base—never pull the ignition wire—and pull straight off without twisting. Use a spark plug boot puller or insulated pliers if needed.
For stubborn boots, apply penetrating lubricant or heat to soften the rubber.
After removal, inspect for damage and clean thoroughly.
Proper removal maintains engine performance and prevents damage; you can explore detailed steps and reinstallation tips next.
Key Takeaways
- Ensure the engine is cool and disconnect the negative battery terminal before starting spark plug boot removal.
- Firmly grip the boot at its base without pulling on the ignition wire to avoid damage.
- Apply steady, straight pulling force without twisting or jerking to safely detach the boot.
- Use a spark plug boot puller or insulated pliers if the boot is difficult to remove.
- Inspect boots for cracks or corrosion after removal and apply penetrating lubricant or heat for stubborn boots.
What Tools You Need to Remove Spark Plug Boots
To remove spark plug boots effectively, you’ll need a few essential tools. First, a spark plug boot puller is invaluable; it grips the boot securely without damaging boot materials like silicone or rubber. Since spark plug types vary, resistor, platinum, or iridium, you must verify your tools fit the specific boot size and shape.
Use insulated pliers if a puller isn’t available, but apply gentle force to avoid tearing the boot. A dielectric grease applicator helps lubricate boots during reinstallation, preserving their integrity. Additionally, a flashlight aids visibility in tight engine bays.
Avoid metal tools that can damage delicate boot materials or the spark plug itself. Equipped with these precise tools, you’ll guarantee safe, efficient removal without compromising spark plug performance or boot durability.
Finding the Spark Plug Boot on Your Engine
Although spark plug boots can be tucked away in tight spaces, you can locate them by tracing the ignition wires from the distributor or ignition coil to the engine block. Begin by identifying the engine layout, as this determines the spark plug location and wiring path.
On inline engines, boots align in a row along the cylinder head. In V-type engines, boots sit on either side of the engine block, matching cylinder banks. For overhead cam engines, spark plugs may be under valve covers, requiring careful inspection.
Use a flashlight to spot rubberized boots connected firmly to the spark plugs. Recognizing the engine layout simplifies finding each spark plug location, ensuring you accurately follow wires to the boots. This precise approach prepares you for safe and efficient spark plug boot removal.
Avoiding Damage When Removing Spark Plug Boots
When removing spark plug boots, you need to grip the boot firmly without pulling on the ignition wire itself, as this can cause internal damage or disconnection. Spark plug materials vary in thermal and electrical properties, so applying excessive force risks cracking ceramic insulators or deforming metal contacts.
The boot design typically includes a flexible silicone or rubber sheath that provides insulation and protection. Use your fingers to grasp this sheath near the spark plug base, ensuring an even pull along the boot’s axis.
Avoid twisting or jerking motions, which can compromise the boot design and lead to premature failure. By respecting these mechanical and material considerations, you’ll maintain the integrity of the ignition system and avoid costly repairs caused by damaged components.
Step-by-Step Guide to Removing Spark Plug Boots Safely
Follow three essential steps to remove spark plug boots safely: confirm the engine is cool, disconnect the negative battery terminal, and use proper hand positioning to pull the boot straight off.
Begin by allowing the engine to cool completely to prevent burns and avoid damaging ignition system components. Next, disconnect the negative battery terminal to eliminate electrical hazards during spark plug maintenance.
When removing the boot, grip the boot firmly at its base. Never pull on the spark plug wire itself to prevent internal wire damage. Apply steady, straight pulling force to detach the boot from the spark plug.
Avoid twisting or jerking motions, which can compromise the ignition system’s integrity. Following this method guarantees safe, effective spark plug maintenance without risking component failure or injury.
How to Handle Stubborn or Stuck Spark Plug Boots
If a spark plug boot is stuck, start by applying a penetrating lubricant to ease removal. Use a proper pulling technique: grip the boot firmly at the base, not the wire, and twist gently while pulling.
If it remains stuck, carefully apply heat to soften the boot and loosen the connection.
Applying Penetrating Lubricant
Spray a penetrating lubricant onto the base of the spark plug boot to loosen corrosion and grime that cause it to stick. Choose lubricant types designed for electrical components to avoid damage. Silicone-based or dielectric lubricants work best. Avoid petroleum-based products, which can degrade rubber.
Apply the lubricant sparingly using a straw nozzle for precision, ensuring it penetrates the boot’s interface with the spark plug. Allow it to soak for 5 to 10 minutes to break down buildup effectively. Reapply if necessary, but avoid oversaturation, which can attract dirt.
These application techniques improve looseness without harming the boot or spark plug. Once lubricated, the boot should release more easily, minimizing the risk of damage during removal.
Using Proper Pulling Technique
Grip the spark plug boot firmly at its base, close to the spark plug itself, to avoid twisting or pulling on the wire. Proper grip strength is essential; using your whole hand rather than fingertips increases control.
Respect the boot flexibility. Don’t force it beyond its elastic limit, which risks damage. Apply steady, straight pulling pressure to coax the boot off.
If it resists, pause and reassess your grip.
| Action | Reason |
|---|---|
| Grip base firmly | Prevent wire damage |
| Use whole hand | Maximize grip strength |
| Pull straight out | Avoid stretching the boot |
Following this technique prevents harm to the spark plug wire and guarantees safe removal without compromising boot integrity.
Employing Heat To Loosen
When stubborn spark plug boots won’t budge using manual force alone, applying controlled heat can soften the rubber and ease removal. Start by selecting an appropriate heat source, such as a heat gun or hairdryer, and apply gentle, even heat around the boot’s base for 30 to 60 seconds.
Avoid open flames to prevent damage, especially with sensitive spark plug types like iridium or platinum. The heat application temporarily increases rubber pliability, reducing adhesion to the spark plug and wire.
After heating, firmly grasp the boot near its base and twist slightly while pulling to disengage it. If resistance persists, reapply heat briefly. This method preserves the integrity of the spark plug types and wiring while minimizing the risk of tearing the boot, ensuring a safe and efficient removal process.
Cleaning and Inspecting Spark Plug Boots After Removal
Begin by thoroughly wiping the spark plug boots with a clean, lint-free cloth to remove dirt, grease, and carbon deposits. Proper boot maintenance extends the life of your ignition system. Use precise inspection techniques. Look for cracks, brittleness, or corrosion that could impair performance.
| Inspection Area | What to Look For |
|---|---|
| Boot Surface | Cracks, tears, or hardening |
| Boot Interior | Carbon buildup, moisture |
| Terminal Contact | Corrosion, pitting |
| Flexibility | Stiffness or brittleness |
After cleaning, gently flex the boot to check elasticity. Any signs of damage or deterioration require further attention, ensuring ideal electrical conductivity and preventing misfires.
When to Replace Spark Plug Boots and Why
Although spark plug boots can last for years, you’ll need to replace them once you notice signs of wear that compromise their function. Cracks, brittleness, or corrosion reduce insulation, causing misfires or weak sparks.
Regular spark plug maintenance should include inspecting boots for physical damage and resistance changes. If you detect arcing marks or carbon tracking, it’s a clear signal to replace the boot.
Worn boots allow moisture and contaminants to enter the ignition system, degrading performance and risking engine damage. Timely replacement guarantees consistent spark delivery, peak combustion, and prevents costly ignition failures.
Always prioritize boots in your ignition system upkeep to maintain reliability and efficiency. Ignoring degraded boots undermines your engine’s performance and can lead to diagnostic challenges or increased emissions. Replace promptly for best results.
How to Reinstall Spark Plug Boots for Best Performance
Replacing worn spark plug boots restores proper insulation and spark delivery, but reinstalling them correctly guarantees peak performance and longevity. Start by verifying boot compatibility with your spark plug materials to prevent misfires and premature wear.
Clean both the boot interior and plug terminal to establish a solid connection. Apply dielectric grease sparingly to improve conductivity and ease future removal. Push the boot firmly onto the spark plug until you feel or hear a click, confirming a secure fit.
| Step | Detail |
|---|---|
| Check Compatibility | Match boots to spark plug materials |
| Clean Contact Points | Remove debris for ideal connection |
| Secure Installation | Push firmly until click confirms fit |
Following these steps maintains ideal spark transmission and extends boot lifespan.
Frequently Asked Questions
What Causes Spark Plug Boots to Wear Out Prematurely?
You cause spark plug boots to wear out prematurely by using poor spark plug materials, improper boot installation, excessive heat exposure, and physical stress.
Ensuring quality materials and correct installation extends their lifespan and maintains performance.
Can Faulty Spark Plug Boots Affect Engine Performance?
Yes, faulty spark plug boots can cause engine misfire by disrupting the electrical connection. You’ll experience rough idling, reduced power, and poor fuel efficiency.
Replacing damaged boots guarantees proper spark plug function and peak engine performance.
Are There Different Types of Spark Plug Boots for Various Engines?
Over 70% of engines require specific spark plug boot types for ideal engine compatibility. You’ll find variations in material, size, and insulation, so always match the boot to your engine’s specs to guarantee reliable performance and longevity.
How Often Should Spark Plug Boots Be Inspected During Maintenance?
You should perform spark plug inspection during every routine maintenance schedule, typically every 30,000 miles or as specified by your vehicle’s manual. Regular checks prevent boot damage and guarantee peak engine performance.
Can I Use Dielectric Grease on Spark Plug Boots?
Yes, you can use dielectric grease during spark plug maintenance to ease boot installation and prevent moisture intrusion. Apply a thin layer inside the spark plug boot for ideal electrical insulation and to extend boot lifespan effectively.
Conclusion
Now you know what tools to gather, where to find the spark plug boot, and how to remove it without causing damage. You’ve learned how to tackle stubborn boots, clean and inspect them, and when to replace for peak function.
Finally, you understand how to reinstall the boot to guarantee a secure fit. Follow these steps carefully, work methodically, and maintain your engine’s performance with confidence and precision.
By mastering how to remove spark plug boot correctly, you ensure your engine runs smoothly and efficiently.