To remove your Jeep Wrangler JK fender flares, gather a ratchet set, screwdrivers, and a plastic trim tool to avoid paint damage.
Start by cleaning the area, then carefully remove bolts, clips, and fasteners along the flare edges. Use a plastic pry tool to gently separate the flares without scratching the paint.
Keep all hardware organized for reinstalling or upgrading.
Following these steps guarantees safe removal—explore further for maintenance tips and upgrade advice.
Key Takeaways
- Gather tools like a ratchet set, screwdrivers, and a plastic trim removal tool before starting flare removal.
- Clean and dry the area around the fender flares to prevent dirt and damage during removal.
- Remove all bolts, clips, and fasteners carefully using appropriate tools, organizing them for reinstallation.
- Use a plastic pry tool to gently separate fender flare edges from the Jeep’s body without scratching paint.
- Inspect wheel wells after removal for rust or damage and clean thoroughly before installing new or existing flares.
Tools and Materials for Removing JK Fender Flares
Before you start removing the fender flares from your Jeep Wrangler JK, gather the right tools and materials to guarantee a smooth process. Different fender flare types, such as OE-style, pocket-style, or smooth, require specific tools based on their installation techniques.
Typically, you’ll need a ratchet set with appropriate sockets, a Phillips and flathead screwdriver, and a plastic trim removal tool to avoid damaging the paint. A torque wrench may be necessary for reinstallation. Additionally, keep a container handy to store screws and clips safely.
For adhesive-mounted flare types, prepare a heat gun or hairdryer to soften the adhesive. Having these tools organized assures you can efficiently tackle any JK fender flare removal without causing damage or delays.
Preparing Your Jeep and Workspace for Fender Flare Removal
Before you start removing the fender flares, gather all essential tools to guarantee a smooth process. Clean the Jeep’s surface around the flares to prevent dirt from interfering with fasteners.
Finally, secure your workspace to maintain safety and organization throughout the removal.
Gather Essential Tools
A well-prepared workspace and the right set of tools are essential for efficiently removing fender flares from your Jeep Wrangler JK. Different fender flare types, such as bolt-on, riveted, or clip-on, demand specific tools. Correct tool selection streamlines the process and prevents damage.
Gather these essentials:
- Socket wrench set for removing bolts on bolt-on flares.
- Trim panel removal tools to pry off clip-on flares without scratching paint.
- Drill with appropriate bits necessary for riveted fender flare removal.
- Screwdrivers, both Phillips and flathead, for screws or clips.
Having these tools ready guarantees you can tackle any flare type on your JK without interruption, maintaining efficiency and precision throughout the removal process.
Clean Jeep Surface
Since dirt and grime can interfere with tool grip and damage your Jeep’s paint during fender flare removal, you’ll want to thoroughly clean the surface around the flares. Use proper cleaning techniques: start with a mild detergent and water to remove loose dirt, then apply an automotive-safe degreaser for stubborn grime. Rinse and dry completely to guarantee surface protection. Avoid harsh chemicals that could degrade paint or plastic.
| Step | Tool/Material | Purpose |
|---|---|---|
| Wash Surface | Mild detergent, water | Remove loose dirt |
| Degrease | Automotive degreaser | Eliminate grease and oils |
| Dry Completely | Microfiber cloth | Prevent water spots, protect paint |
This systematic approach guarantees a clean, protected surface for safe fender flare removal.
Secure Workspace Area
With the Jeep surface clean and dry, focus on securing your workspace to confirm safety and efficiency during fender flare removal. Prioritize workspace safety by minimizing hazards and organizing tools systematically.
Follow these organization tips to maintain a controlled environment:
- Clear the area of unnecessary objects to prevent tripping or damage.
- Arrange tools and fasteners in labeled containers for easy access.
- Guarantee adequate lighting to spot clips, bolts, and trim without errors.
- Use protective gear like gloves and safety glasses to avoid injury.
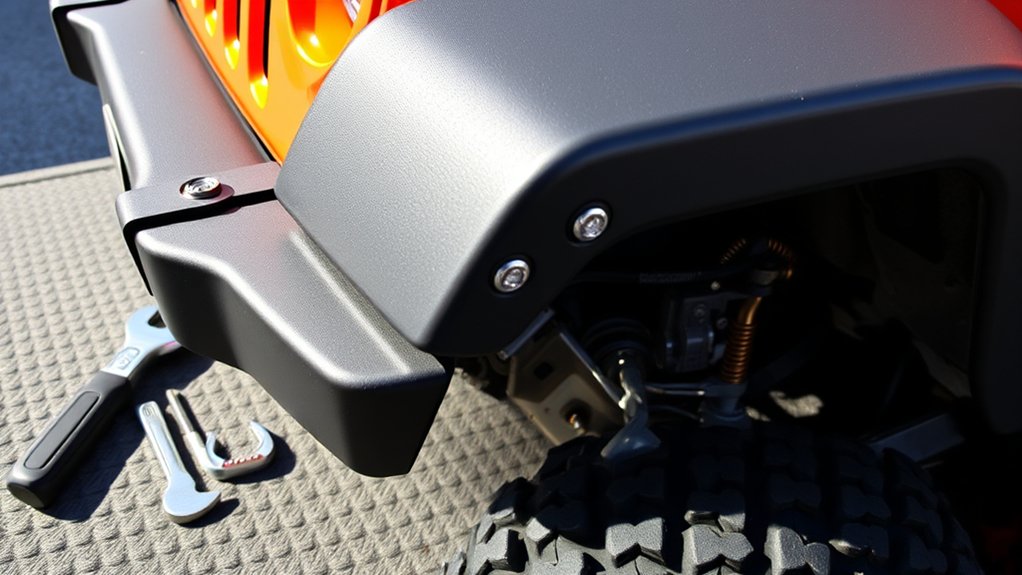
Removing Bolts, Clips, and Fasteners on JK Fender Flares
Start by locating all bolts securing the fender flare, typically along the inner edge and wheel well.
Next, remove the plastic clips carefully to avoid damage, using a trim removal tool if needed.
Finally, identify fastener types, whether screws, rivets, or push pins, and use the appropriate tools to detach them cleanly.
Identifying Bolt Locations
Five key bolt locations secure the fender flares on a Jeep Wrangler JK. To remove them correctly, you need to identify each bolt type and understand its role in flare alignment.
Locate these bolts:
- Along the outer edge of the flare, securing it to the body panel.
- At the front near the hood line, ensuring the flare’s proper fit.
- Along the wheel well, holding the flare firmly around the tire opening.
- Near the rear edge, connecting the flare to the quarter panel.
Each bolt type varies; some are hex head, others Torx. Identifying these precise locations and bolt types is essential for loosening the flare without damage, maintaining proper flare alignment during removal and reinstallation.
Removing Plastic Clips
After locating and understanding the various bolt types securing your Jeep Wrangler JK’s fender flares, you’ll need to address the plastic clips that also hold the flares in place. These clip types vary, typically including push-in and snap-in clips, each requiring specific removal techniques.
Use a flathead screwdriver or panel clip tool to carefully pry under the clip’s retaining edge without damaging the flare or body paint. Apply steady, controlled pressure to disengage the clip from its mounting hole.
Keep in mind the original installation techniques. Clips are often installed by pushing until they snap securely, so reversing this requires patience. Properly removing these clips guarantees you avoid breakage, facilitating reinstallation or replacement.
Always inspect clips for damage post-removal and replace any compromised ones to maintain secure flare attachment.
Handling Fastener Types
Understanding the different fastener types securing your Jeep Wrangler JK’s fender flares is essential for efficient removal. Fasteners vary by materials: plastic, steel, or aluminum, and sizes, affecting tool choice and removal technique.
To handle them properly:
- Identify fastener materials to select the right tool. Plastic clips need a trim removal tool, steel bolts require a socket wrench.
- Note fastener sizes to match socket or screwdriver heads precisely, preventing stripping or damage.
- Carefully pry plastic clips to avoid breakage; use penetrating oil on metal bolts if rusted.
- Keep removed fasteners organized by type and size for reinstallation.
Detaching Fender Flares Without Damaging Paint
To detach the fender flares without damaging your Jeep Wrangler JK’s paint, start by carefully loosening the mounting bolts or clips using the appropriate tools. Use a plastic pry tool to gently separate the flare edges from the body, preventing scratches or chips.
Avoid using metal tools directly on painted surfaces to maintain paint protection. Work methodically around the flare, releasing all fasteners before attempting full removal.
If you plan to replace the flares, consider flare alternatives with integrated paint protection features or simpler mounting systems to reduce future risk. Always keep the work area clean and handle the flares delicately to avoid gouges or abrasions.
This precise approach guarantees your Jeep’s paint remains intact throughout the removal process.
Cleaning and Inspecting Wheel Wells After Flare Removal
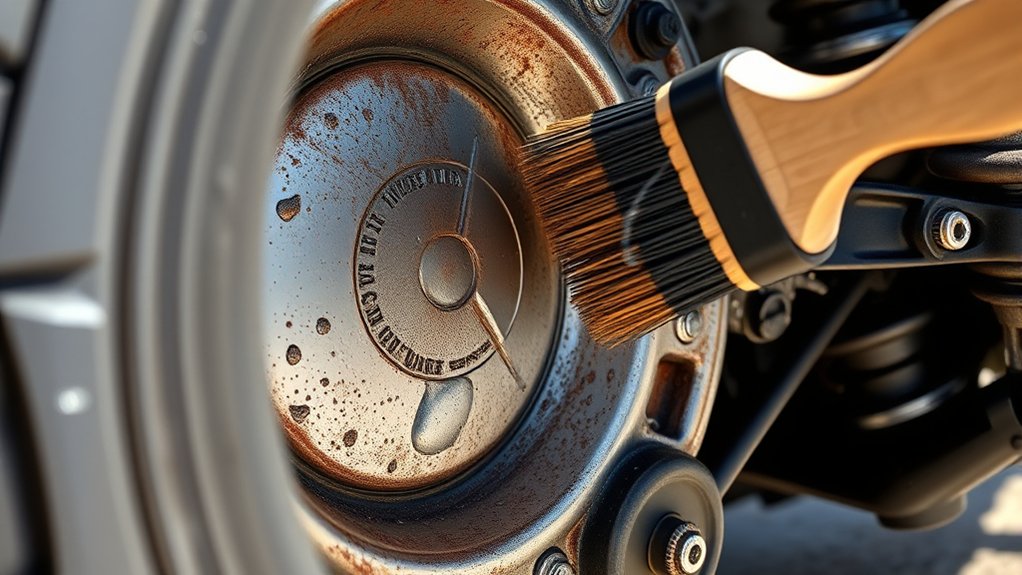
Once you’ve removed the fender flares, thoroughly clean the wheel wells to eliminate dirt, debris, and any residual adhesive. Proper wheel well maintenance is essential to prevent rust and maintain your Jeep’s structural integrity. Follow these steps:
- Use a pressure washer or hose to remove loose dirt and grime.
- Apply a degreaser or automotive cleaner to break down stubborn residue.
- Scrub the wheel wells with a stiff brush, focusing on crevices and fastener holes.
- Inspect the cleaned area for rust spots, paint damage, or corrosion.
Address any rust promptly by sanding and applying rust inhibitor to guarantee long-term protection. This process not only preserves your Jeep’s appearance but also enhances rust prevention, keeping your wheel wells in prime condition.
Troubleshooting Common Fender Flare Removal Challenges
Although removing fender flares from your Jeep Wrangler JK is usually straightforward, you may encounter issues like stuck fasteners, broken clips, or adhesive residue. If fasteners are stuck, apply penetrating oil and allow it to soak before gently prying.
For broken clips, replace them promptly to maintain proper fender flare alignment during reinstallation. Adhesive residue can be removed with isopropyl alcohol or adhesive remover, but avoid harsh chemicals that may damage paint protection.
Use a plastic trim tool to minimize scratching the paint when separating flares. Always work methodically, loosening fasteners in sequence to prevent stress on the flare or body panels.
Addressing these challenges carefully guarantees you preserve the Jeep’s structural integrity and paint protection while preparing for smooth reattachment or upgrades.
When and Why to Replace or Upgrade Your Fender Flares
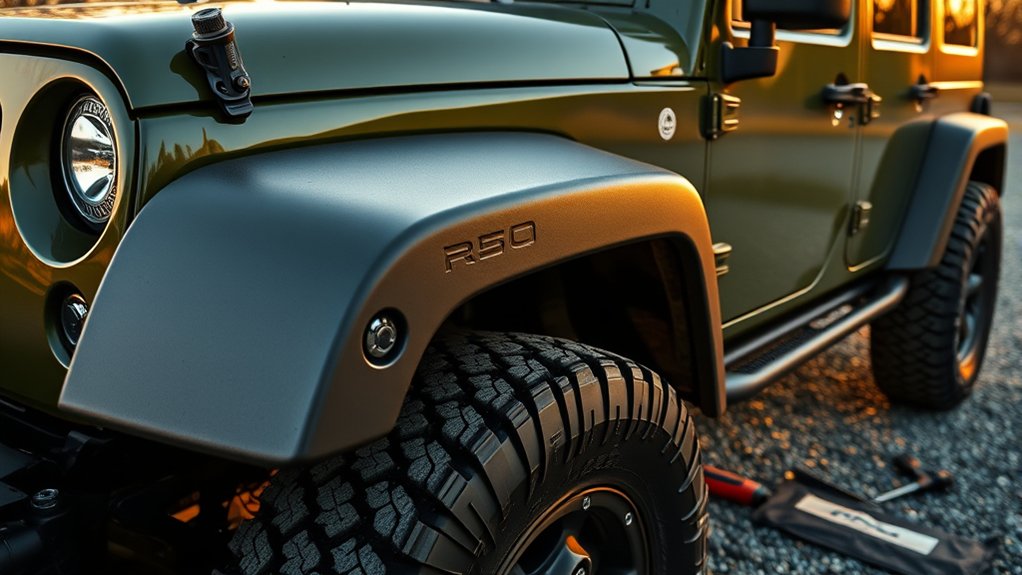
Deciding when to replace or upgrade your Jeep Wrangler JK’s fender flares depends on factors like damage, wear, and your vehicle’s intended use. You should consider upgrading or replacing fender flares when:
- Existing flares show cracks, fading, or deformation compromising protection.
- You want to switch to different fender flare styles for enhanced aesthetics or functionality.
- You need wider flares to accommodate larger tires or off-road modifications.
- You seek upgrade benefits like improved durability, corrosion resistance, or better splash guard performance.
Choosing the right time guarantees your Jeep maintains peak protection against debris and complies with tire coverage regulations. Upgrading your fender flares also enhances your vehicle’s look and off-road readiness, making it easier to tailor your Wrangler JK to your specific driving needs.
Final Tips for Maintaining Your Jeep After Fender Flare Removal
Upgrading or removing your Jeep Wrangler JK’s fender flares opens the door to new maintenance routines that protect exposed areas and preserve your vehicle’s performance. After removal, conduct a thorough post removal inspection to identify any damage, rust, or debris accumulation on the wheel wells and body panels.
Address any surface imperfections immediately to prevent corrosion. Regular fender flare maintenance is essential even without flares installed. Clean and protect exposed areas with appropriate rust inhibitors and sealants.
Monitor bolt holes and mounting points for signs of wear or deformation, ensuring structural integrity. Keep an eye on suspension and tire clearance, as changes from flare removal may affect debris deflection and vehicle dynamics.
Consistent upkeep will maintain your Jeep’s durability and appearance over time.
Frequently Asked Questions
Can I Remove Fender Flares Without Lifting the Jeep?
Yes, you can perform fender flare removal without lifting your Jeep. For effective Jeep maintenance, make sure the vehicle is on a flat surface and securely parked, allowing safe access to bolts and clips without the need for elevation.
Will Removing Fender Flares Affect My Jeep’s Warranty?
Picture your Jeep’s warranty as a safety net; removing fender flares might void it if you stray from factory specifications. Always check warranty implications with your dealer before altering parts to keep coverage intact.
How Do Fender Flares Impact Off-Road Performance?
Fender flares improve your off-road performance by increasing tire clearance and preventing debris from hitting your Jeep.
They offer essential mud protection, reducing damage and maintaining vehicle integrity during rugged terrain navigation.
Are Aftermarket Fender Flares Compatible With JK Models?
Think of your Jeep as a canvas; aftermarket fender flare types vary like brush strokes. You’ll find most JK-compatible, but check fitment carefully.
Follow installation tips precisely to guarantee secure, seamless integration with your Wrangler’s rugged frame.
Can I Paint My Fender Flares to Match My Jeep?
You can paint your fender flares for customization, but guarantee you use proper prep, primer, and automotive paint to maximize paint durability. This approach prevents peeling and maintains a professional, long-lasting finish matching your Jeep’s color.
Conclusion
By carefully removing your Jeep Wrangler JK’s fender flares, you not only protect its paint but also uncover opportunities for upgrades or repairs you didn’t realize were needed—coincidentally improving both appearance and function.
With the right tools and attention to detail, you’ll guarantee a smooth removal process and maintain your Jeep’s integrity.
Remember, each step you take now saves you time and money down the road, making maintenance straightforward and efficient. Following these tips will ensure a hassle-free experience when you remove fender flares Jeep Wrangler JK.