To remove grill inserts on your Jeep Wrangler, first park on a flat surface, engage the parking brake, and disconnect the battery for safety. This ensures a secure working environment before you begin.
Use screwdrivers and a trim removal tool to gently pry around the grill’s perimeter. Carefully lift the grill inserts to avoid causing any damage to the surrounding area.
Handle clips with steady, even pressure to release them without snapping. Organize and inspect all fasteners as you work to keep track of every component.
Following this methodical approach helps prevent damage and prepares you to tackle more detailed maintenance and troubleshooting.
Key Takeaways
- Park the Jeep on a flat surface, engage the parking brake, and disconnect the battery before starting the grill insert removal.
- Open the hood and use a flathead screwdriver or trim removal tool to gently pry around the grill insert perimeter.
- Identify the types of clips or fasteners securing the grill insert and use appropriate tools to release them without damage.
- Apply steady, even pressure when lifting the grill insert to avoid breaking clips or the insert itself.
- Inspect and clean mounting points if the grill insert is stuck, and keep fasteners organized for easy reinstallation.
Essential Tools for Removing Jeep Wrangler Grill Inserts
Before you begin removing the grill inserts on your Jeep Wrangler, gather the essential tools to guarantee a smooth process. You’ll need a set of screwdrivers, both Phillips and flathead, to accommodate various fasteners. A trim removal tool is vital to prevent damage to the plastic components.
Additionally, having a ratchet set with compatible sockets makes sure you can address bolts with different head sizes. Confirm grill insert compatibility beforehand to avoid using incorrect tools that could strip screws or damage the insert.
Maintain your tools by cleaning and lubricating moving parts regularly. This prevents wear and promotes efficient operation. By preparing the right, well-maintained tools, you’ll streamline the removal process while protecting your Jeep’s components from unnecessary harm.
Preparing Your Jeep for Grill Insert Removal
Before removing the grill inserts, make certain you’ve gathered all necessary tools, including screwdrivers and trim removal tools.
Park your Jeep on a flat surface and engage the parking brake to guarantee stability. Disconnect the battery to prevent any electrical issues during the process.
Gather Necessary Tools
To efficiently remove the grill inserts on your Jeep Wrangler, you’ll need to assemble a specific set of tools designed for precision and safety. Start with a trim removal tool to prevent damage to plastic clips securing various grill insert types.
A small flathead screwdriver will help you reach tight fasteners, while a Phillips screwdriver is essential for screws common in the assembly. Have a socket wrench set ready for any bolts requiring extra torque.
Additionally, a pair of needle-nose pliers can assist in removing stubborn clips or connectors. Gathering these tools beforehand aligns with maintenance tips, ensuring a smooth, damage-free process.
Organize your workspace to keep tools accessible and avoid misplacing components during the grill insert removal procedure.
Ensure Vehicle Safety
Although the grill insert removal process may seem straightforward, guaranteeing your Jeep Wrangler is securely prepared is essential to avoid accidents or damage. Begin by parking on a flat, stable surface to maintain vehicle stability throughout the procedure. Engage the parking brake firmly to prevent any unintended movement.
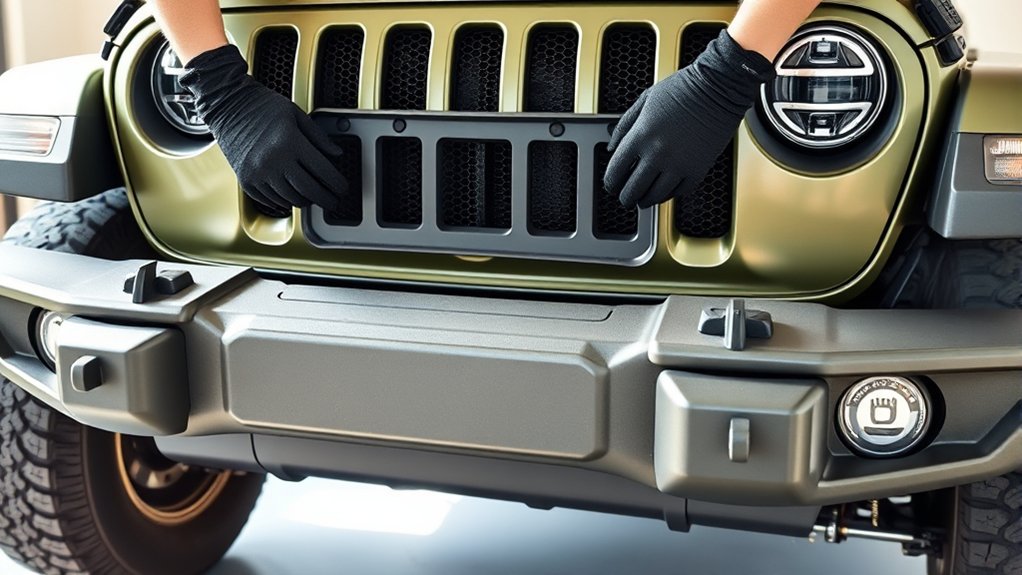
Next, disconnect the negative battery terminal to eliminate electrical risks during removal. Wear protective gloves and safety glasses to follow proper safety precautions. Before starting, verify the engine is off and cooled down to avoid burns.
Finally, keep your workspace organized and clear of obstructions to guarantee efficient access to the grill area. These methodical safety steps help protect both you and your vehicle during the grill insert removal process.
Step-by-Step Guide to Removing Jeep Wrangler Grill Inserts
Start by positioning your Jeep Wrangler on a flat surface and ensuring the engine is off and cool. Open the hood to access the grill insert.
Identify the type of grill insert materials, as these may affect removal techniques. Typically, you’ll find plastic or metal inserts secured by clips or screws.
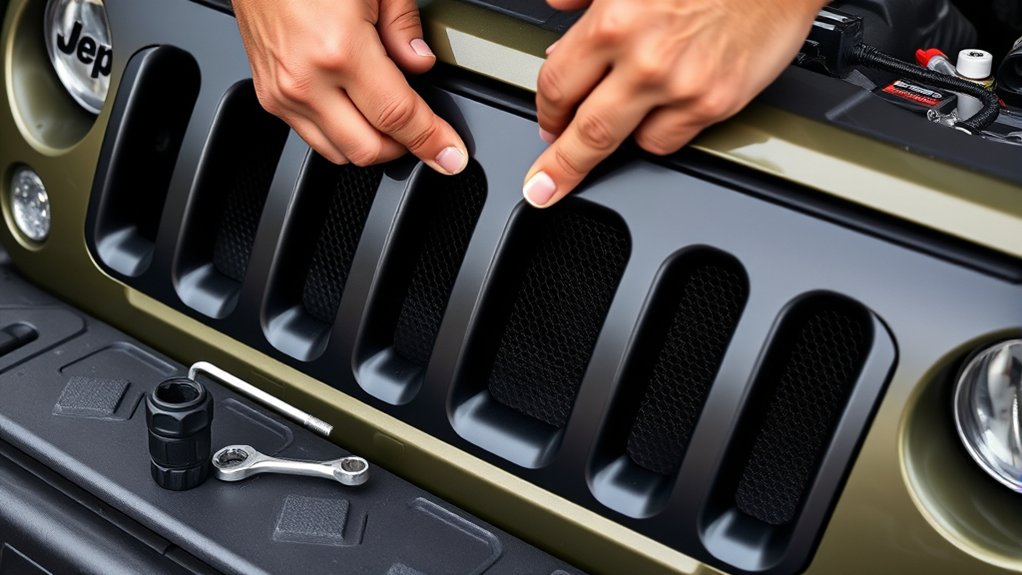
Use a flathead screwdriver or trim removal tool to gently pry around the perimeter, loosening the insert without damaging surrounding components. Carefully lift the grill insert upward, maintaining steady pressure.
If resistance occurs, double-check for hidden fasteners. Removing the grill inserts cleanly is essential for seamless Jeep customization options, allowing you to replace or upgrade parts efficiently.
Follow these steps systematically to avoid damage and prepare for your next modification.
How to Handle Jeep Grill Clips and Fasteners Without Damage
Handle Jeep grill clips and fasteners carefully to prevent damage during removal. Understanding grill clip types is crucial to apply the correct technique and maintain fastener safety. Before you start, identify whether the clips are push-type, screw-type, or snap-on.
Use the proper tools to avoid breaking or deforming them. Use a flathead screwdriver or trim removal tool for gentle leverage. Apply steady, even pressure to release clips without snapping. Avoid using excessive force to preserve clip integrity.
Keep track of all fasteners to guarantee proper reinstallation. If clips show wear or damage, replace them immediately to maintain grill stability.
Cleaning and Inspecting Behind Jeep Wrangler Grill Inserts

Once the grill inserts are removed, clean the area behind them thoroughly using a soft brush and mild detergent to remove dirt and debris. Carefully inspect for any cracks, corrosion, or loose components that could affect performance.
Address any damage immediately to maintain the integrity of your Jeep Wrangler’s front end.
Cleaning Behind Grill Inserts
Although removing the grill inserts exposes the area behind them, you’ll need to carefully clean and inspect this space to prevent debris buildup and identify any potential damage. Start by selecting appropriate cleaning products designed for automotive use to avoid harming the plastic or metal surfaces. Use a soft brush or microfiber cloth to loosen dirt without scratching.
Follow these grill maintenance tips for peak results:
- Remove loose debris with compressed air or a vacuum.
- Apply a mild detergent solution to stubborn grime.
- Gently scrub with a soft brush, focusing on corners.
- Rinse with low-pressure water to avoid damage.
- Dry thoroughly to prevent corrosion or mold growth.
This methodical cleaning guarantees your Jeep Wrangler’s grill area remains clear and functional.
Inspecting for Damage
Before reassembling your Jeep Wrangler’s grill, you should carefully inspect the area behind the inserts for any signs of damage. Begin with a thorough visual inspection, focusing on the mounting points, clips, and surrounding body panels.
Look for cracks, breaks, or deformations that could compromise the grill’s stability. Pay close attention to any grill insert damage caused by road debris or previous impacts. Use a flashlight to illuminate hard-to-see areas for a more detailed assessment.
If you identify any damage, document its location and severity before deciding on repairs or replacements. This methodical inspection guarantees the grill inserts fit securely and maintain structural integrity, preventing future issues and maintaining your Jeep’s appearance and function.
Reinstalling or Upgrading Your Jeep Wrangler Grill Inserts
Begin by carefully aligning the grill inserts with the mounting points on your Jeep Wrangler. Whether reinstalling original inserts or upgrading aesthetics, precision is key. Proper alignment guarantees secure attachment and peak performance, including improving airflow to the engine bay.
Follow these steps:
- Match tabs and clips on the inserts to corresponding slots on the grille frame.
- Apply even pressure to snap the inserts into place without forcing them.
- Double-check that each clip is fully engaged to prevent rattling or detachment.
- For upgraded inserts, confirm compatibility with your Jeep model to maintain fit quality.
- Test the airflow visually or with a handheld anemometer to verify improvements.
Troubleshooting Common Jeep Wrangler Grill Insert Removal Issues
When you encounter resistance or difficulty removing Jeep Wrangler grill inserts, it often indicates that clips or tabs are still engaged or that debris has accumulated in the mounting points. Verify grill insert compatibility to avoid stress on clips.
Common installation mistakes, such as forcing inserts or neglecting to clear debris, lead to damage or stuck parts. Use a plastic trim tool to gently disengage clips.
| Issue | Cause | Solution |
|---|---|---|
| Clips won’t release | Still engaged or broken clips | Use trim tool; inspect clips |
| Insert stuck in place | Debris in mounting points | Clean mounting area thoroughly |
| Misalignment | Incorrect grill insert | Confirm grill insert compatibility |
| Difficulty applying force | Over-tightening or wrong method | Apply even pressure; follow manual |
Frequently Asked Questions
Can I Remove Grill Inserts Without Professional Help?
Yes, you can remove grill inserts yourself using DIY removal techniques. You’ll need simple tools like screwdrivers and pliers.
Follow step-by-step instructions carefully to avoid damage, ensuring a precise, methodical approach throughout the process.
Are Aftermarket Grill Inserts Compatible With All Jeep Wrangler Models?
Not all aftermarket options fit every Jeep Wrangler model; you’ll need to verify compatibility based on your year and trim. For installation tips, carefully compare mounting points and follow manufacturer instructions to guarantee proper fit and secure attachment.
How Do Grill Inserts Affect Jeep Wrangler Engine Cooling?
Imagine your Jeep’s engine breathing through a narrow vent. Grill inserts can restrict engine airflow, potentially disrupting temperature regulation. You’ll want to choose inserts that balance protection with efficient cooling to maintain ideal engine performance.
What Is the Average Time to Remove and Replace Grill Inserts?
You’ll spend about 30-45 minutes removing and replacing grill inserts. DIY tips: gather basic hand tools like screwdrivers and trim removal tools.
Work methodically to avoid damaging clips and guarantee precise reinstallation for best fit.
Can Damaged Grill Inserts Be Repaired Instead of Replaced?
You might think damaged grill inserts require full replacement, but repair techniques like plastic welding or epoxy bonding work well depending on insert materials. Assess damage type and material before methodically applying the appropriate fix for durability.
Conclusion
Removing your Jeep Wrangler grill inserts may seem intimidating, but with the right tools and careful steps, it’s straightforward. Don’t worry about damaging clips—using a plastic trim tool and patience prevents breaks. Picture gently prying each clip without forcing it, like easing a lid off a jar.
Following this methodical approach guarantees a clean removal, letting you upgrade or clean with confidence and precision every time. By mastering these steps, removing grill inserts on Jeep Wrangler becomes an easy and damage-free process.