To fill engine oil in your car, start by parking on a level surface with the engine cool.
Checking the oil level using the dipstick is essential before adding any oil. This ensures you know how much oil your engine needs.
Next, choose the correct oil type and viscosity based on your vehicle’s manual.
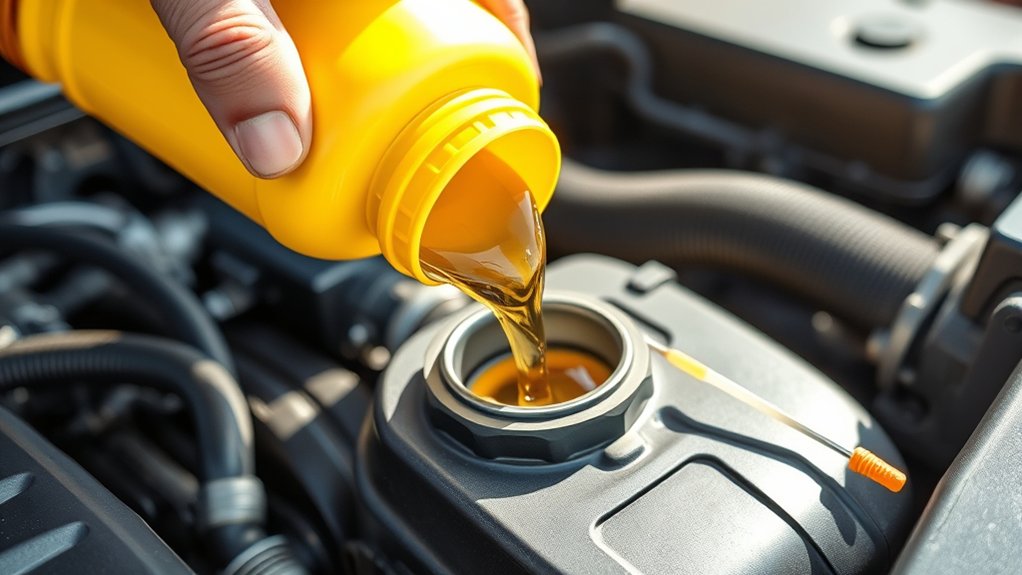
Using a clean funnel, slowly pour the oil into the filler neck to avoid spills.
Recheck the oil level frequently to prevent overfilling.
Finally, secure the oil cap tightly and clean any drips around the filler neck.
Following these steps guarantees proper lubrication and optimal engine performance.
Explore further for detailed guidance and useful tips.
Key Takeaways
- Park the car on a level surface with a cool engine before starting the oil filling process.
- Use a clean funnel and pour the correct oil type and viscosity slowly into the filler neck.
- Check the oil level frequently with the dipstick to avoid overfilling.
- Securely replace the oil cap and clean any spills after filling to prevent contamination.
- Dispose of used oil responsibly to protect the environment and comply with regulations.
When and How to Check Your Engine Oil Level
To accurately check your engine oil level, start by ensuring the car is parked on a level surface and the engine is cool or has been off for at least 10 minutes. Open the hood, locate the dipstick, and pull it out. Wipe it clean with a lint-free cloth, reinsert fully, then pull it out again to read the oil level.
The oil should sit between the minimum and maximum markers. Regularly monitoring the oil level is essential for engine oil maintenance to prevent damage and optimize performance.
Adhere to the manufacturer’s recommended oil change frequency, typically every 5,000 to 7,500 miles, but adjust based on driving conditions. Checking oil frequently helps you detect leaks or consumption issues early, ensuring your engine runs smoothly and prolonging its lifespan.
How to Choose the Right Engine Oil for Your Car
You need to select the correct engine oil type based on your car’s specifications, such as conventional, synthetic, or blend.
Pay close attention to the oil’s viscosity grade, which affects how it performs under different temperatures. Using the right viscosity guarantees ideal lubrication and engine protection.
Oil Types Explained
Although selecting engine oil might seem straightforward, choosing the right type requires understanding viscosity grades, additive packages, and manufacturer specifications. You’ll primarily encounter two oil types: synthetic oils and mineral oils.
Synthetic oils are engineered for superior performance, offering enhanced thermal stability, oxidation resistance, and longer service intervals. Mineral oils, derived from crude oil refining, provide adequate lubrication but degrade faster under extreme conditions.
Check your vehicle’s manual for recommended oil types and specifications. Avoid mixing oil types, as this can compromise performance.
Also, consider the additive package, which enhances properties like detergency and wear protection. By selecting the appropriate oil type, you guarantee peak engine protection and efficiency, extending your car’s lifespan and maintaining warranty compliance.
Viscosity Importance
Selecting the right engine oil goes beyond choosing between synthetic and mineral types; understanding viscosity plays a key role in enhancing engine performance. Oil viscosity measures the oil’s resistance to flow, directly affecting lubrication efficiency.
You need to select an oil viscosity grade suitable for your car’s operating temperature range because temperature effects influence oil thickness. At low temperatures, oil that’s too viscous won’t circulate properly, causing increased engine wear.
Conversely, oil that’s too thin at high temperatures won’t provide adequate protection, risking metal-to-metal contact. Always refer to your vehicle’s manual to choose the recommended viscosity grade, typically indicated by SAE numbers like 5W-30.
This guarantees the oil maintains ideal flow characteristics under varying temperature conditions, promoting engine longevity and efficiency.
Preparing Tools and Supplies for Filling Engine Oil
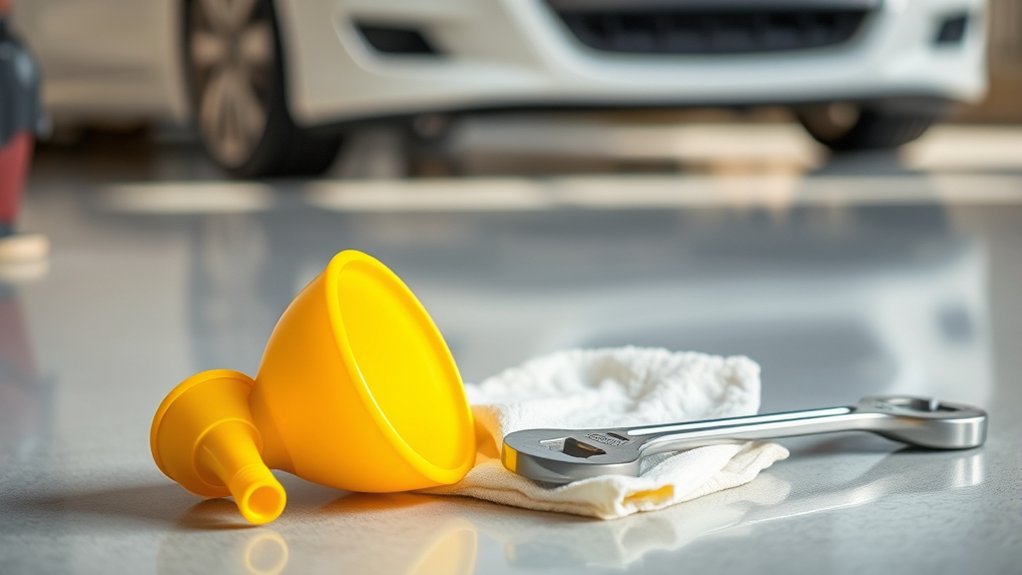
A well-prepared workspace guarantees a smooth and efficient engine oil filling process. Begin by selecting an appropriate oil funnel; choose one with a narrow spout to fit the oil fill port precisely, minimizing spills. Ascertain the funnel material is resistant to oil degradation.
Next, gather the engine oil containers, confirming they contain the correct oil type and grade specified for your vehicle. Keep the containers sealed until use to prevent contamination. Additionally, have clean rags or paper towels ready to wipe any accidental drips.
Position the vehicle on a level surface and ascertain the engine is cool before starting. Organizing these tools and supplies beforehand will streamline the filling procedure and maintain engine health by preventing contamination and overfilling errors.
How to Add the Right Amount of Engine Oil
To add the right amount of engine oil, start by consulting your vehicle’s owner manual to determine the exact oil capacity required. This specification is critical to avoid overfilling or underfilling, both of which can damage engine components.
Identify the recommended oil type and viscosity based on your engine specifications to guarantee peak performance. Use a calibrated measuring container to pour oil incrementally, checking the oil dipstick frequently after each addition.
Choose the correct oil type and viscosity, adding gradually while frequently checking the dipstick for accuracy.
The dipstick will indicate when the oil level reaches the appropriate mark, which aligns with the oil capacity outlined in the manual. Avoid guessing the amount; precision is key.
Maintaining the correct oil level protects your engine’s lubrication system, prevents overheating, and promotes efficient operation. Always adhere strictly to the guidelines provided by the manufacturer’s engine specifications.
Step-by-Step Guide to Filling Engine Oil Safely

First, make sure your vehicle is parked on a level surface and the engine is cool before starting.
Next, check the current oil level using the dipstick to determine how much oil you need to add.
Finally, pour the oil slowly and steadily into the filler neck to avoid spills and overfilling.
Preparing the Vehicle
Before you start filling engine oil, make certain the car is parked on a level surface and the engine is cool to prevent inaccurate readings and potential burns. Engage the parking brake to guarantee vehicle safety during the procedure.
Open the hood and secure it properly to maintain stability while working. Locate the oil filler cap and the dipstick for reference.
Wear gloves to protect your hands from contaminants and hot surfaces, emphasizing personal safety. Gather all necessary tools and the correct grade of engine oil specified in your owner’s manual.
Inspect the surrounding area for leaks or damage, as part of routine engine maintenance. Taking these preparatory steps guarantees a safe, efficient, and accurate oil filling process, minimizing risks and supporting ideal engine performance.
Checking Oil Levels
Begin by removing the dipstick from its tube, wiping it clean with a lint-free cloth, and reinserting it fully to confirm an accurate oil level reading. The oil dipstick function is to measure the engine oil’s current volume, allowing you to assess whether more oil is needed.
After reinserting the dipstick, pull it out again and examine the oil level indicators near its tip. These indicators typically consist of two marks: minimum and maximum. Make sure the oil film sits between these marks; oil below the minimum suggests you need to add oil, while levels above the maximum can cause engine issues.
Always check the oil level on a cold engine or after it has been off for several minutes to ensure the oil has settled for an accurate reading.
Pouring Oil Correctly
Once you determine that your engine oil level is below the minimum mark, it’s time to add oil carefully to avoid overfilling. First, remove the oil filler cap, verifying the engine is cool to prevent burns.
Use a clean funnel to guide the oil, which improves accuracy and prevents spills. This is a key oil pouring technique. Pour slowly, adding small amounts, then wait a minute for the oil to settle.
After each addition, recheck the dipstick to monitor the level precisely. Avoid topping off too quickly; overfilling can damage the engine.
When finished, securely replace the oil cap and wipe any spilled oil from the engine surface. Following these oil filling tips guarantees safe, efficient oil addition, maintaining peak engine performance and longevity.
Avoid Common Engine Oil Filling Mistakes
Although filling engine oil might seem straightforward, you need to avoid common mistakes that can compromise engine performance or cause damage. Many engine oil myths and common misconceptions lead to improper filling practices.
To guarantee accuracy, follow these guidelines:
- Don’t overfill the engine oil; excess oil causes foaming and pressure issues.
- Avoid using the wrong oil grade based on outdated advice or myths.
- Never skip checking the oil level with the dipstick after filling.
- Don’t pour oil hastily; use a funnel to prevent spills and contamination.
How to Dispose of Used Engine Oil Properly
When you finish changing your engine oil, you must dispose of the used oil responsibly to prevent environmental contamination and comply with local regulations. Collect the oil in a sealed, leak-proof container and avoid mixing it with other fluids.
Take it to an authorized recycling center or auto shop that accepts used oil for oil recycling. Proper disposal minimizes the environmental impact by preventing soil and water pollution.
| Environmental Impact | Personal Responsibility |
|---|---|
| Contaminates soil and water | Protects ecosystems |
| Harms wildlife | Supports community health |
| Pollutes groundwater | Reduces hazardous waste |
Frequently Asked Questions
Can I Mix Synthetic and Conventional Engine Oils?
You can mix synthetic and conventional oil types, but it’s best to minimize mixing ratios to avoid compromising performance.
Always check your car’s manual for recommended oil types and mixing guidelines to maintain engine protection and efficiency.
How Often Should I Change My Engine Oil Completely?
Think of your engine oil like blood. Change it every 3,000 to 7,500 miles, depending on your vehicle.
Don’t forget to replace the oil filter during oil changes to keep contaminants out and maintain peak performance.
What Happens if I Overfill the Engine Oil?
If you overfill the oil level, it can cause engine damage by increasing pressure, leading to oil foaming and reduced lubrication.
You should drain excess oil promptly to maintain the correct level and protect your engine’s performance.
Can Cold Weather Affect Engine Oil Performance?
Cold weather effects cause engine oil to thicken, increasing oil viscosity and slowing flow. You’ll notice sluggish starts and reduced lubrication.
Always use oil with the right viscosity grade to guarantee proper engine protection in low temperatures.
Is It Necessary to Warm up the Engine Before Adding Oil?
You don’t have to warm up the engine before adding oil, but ensuring the engine temperature is moderate helps the oil viscosity remain stable. This allows accurate level readings and proper lubrication once the engine runs.
Conclusion
Now that you know exactly when and how to check, choose, and add engine oil, you’re armed to keep your car running like a high-performance machine. Skipping these steps? You might as well watch your engine scream in protest!
Follow the precise instructions, avoid common mistakes, and handle disposal responsibly. Filling engine oil isn’t just maintenance—it’s the lifeline your engine demands to roar smoothly down every road.
Don’t risk it; do it right every time. Remember, proper engine oil filling is essential to ensure your car’s engine performs at its best and lasts longer.